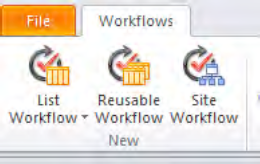
Just like you have the ability to edit out of the box
workflows, using SharePoint Designer you can also craft up brand new
workflows. In order to do so, open your site collection and SharePoint
Designer and click the workflows section. From the ribbon, you will see
three possibilities as shown in Figure 1.
A list workflow is associated with an individual
list. This is very similar to how it used to be authoring workflows in
SharePoint Designer 2007 with the concept of association when an
initiation was merged. Compared to SharePoint Designer 2007, SharePoint
Designer 2010 offers significant improvements such as a completely
redesigned workflow editor, the ability to export workflows as .wsp's,
and so forth.
The second button, "Reusable Workflow", is very
similar to the customization of the out of the box workflow . Creating a reusable
workflow simply means that you're targeting the workflow to a particular
content type. Once you have crafted up such a workflow definition, you
can then associate this workflow with the source content type or any
content types that inherit from the source content type.
The last button is rather interesting. It allows you
to target the workflow to the site. This is something you were not able
to do in SharePoint 2007. Frequently, you will be presented with
enterprise processes that don't really tie to a list item. In fact, they
don't even tie to a document set. In those instances, it is helpful to
run the workflow on a container that is not exactly an individual list
item. SharePoint 2010 allows you to run workflows on a site collection.
These are referred to as site workflows. Let's create a site workflow.
The workflow I am about to set up adds the facility
of users being enabled to add simple reminders for themselves in the
site. Similar to a calendar, by starting a workflow, the user would be
able to enter a title, a description, and a date and time at which an
e-mail would be sent to the user with the title and description with a
reminder.
Start SharePoint Designer, and under workflows, click
site workflow in the ribbon. Call your new Workflow "Remind Me". Add
the following initiation form parameters to this workflow:
Remind title: Single line of text, visible on the initiation form only.
Remind description: Multiple Lines of text, visible on the initiation form only.
Remind time: Date and Time. The form should ask for both date and time, visible on the initiation form only.
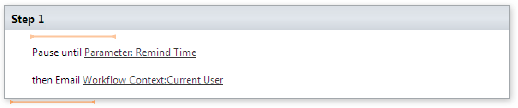
Next, craft up the workflow, as shown in Figure 2.
Now go back to the main workflow page within
SharePoint Designer and check the check box for "Show workflow
visualization on status page". Save and publish the workflow. If you get
any errors during publishing, make sure that you followed all the
previous steps, including populating the subject and body of the email.
Next, visit your site collection in the web browser
and visit all site content and click the "Site Workflows" link. Here you
should see the option to start the "Remind Me" workflow. Start this
workflow but note that by starting up this workflow SharePoint prompts
you with the initiation form, as shown in Figure 3.

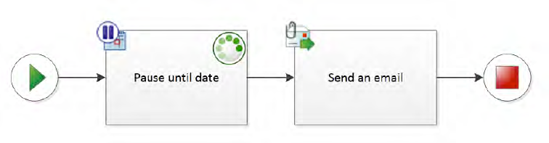
Fill out the form as shown and click the start
button. Note that the workflow visualization clearly tells you exactly
where the workflow is at the given point. This can be seen in Figure 4.
Once the workflow has finished, and assuming that you
have your SMTP server configured, you should receive an e-mail with the
necessary reminder.